
This weekend we knocked out a big project that I've been dying to have done, but really really not wanting to start. As you can see, we painted our dining room table. The reason I was so hesitant? Well, this isn't my first go around with painting this table. We bought this table and chairs set on Craigslist when we still lived in our old apartment (so 6 years ago... ish) and it was solid oak. The table top needed refinished, so we stripped and sanded it down, refinished the top, and painted the legs and spindles all blue (all in our tiny apartment, in January). I loved how it fit and looked in my last house.

here's the before picture
which is sort of the middle picture
since it was once the after picture
got it? good!
However, all things have a season, including my blue table that just didn't look right in my new kitchen. So I was torn between repainting or replacing, but I'm cheap and sentimental, so here comes a weekend painting project! First we primed all the remaining wood parts with Zinnser Cover Stain Primer (yay for no sanding!). (For the record, I planned to have it tinted so I wouldn't have to paint black over bright white primer, but I had two kids with me in Lowes on a busy Saturday morning and forgot. So here's to getting it right the third time I paint this table... because we all know that's probably inevitable).


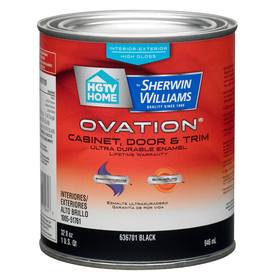
Then we painted all the rest with this HGTV Home by Sherwin Williams black enamel paint. It took 2 full coats, plus spot coverage on the painted parts, and 3 coats over the white primer.

For the top of the table, I decided to use Benjamin Moore Muslin, which is one of the colors that matches our Cambria quartz counter tops (the two companies paired up to have a series of colors that perfectly match the different colored counter tops. It's called the paint match tool on their websites.) I like how it breaks up the stark black. And how it gives me a great excuse to go buy some cute tablecloths and/or place mats since I now have a very light colored table top (the paint is scrubbable, at least).

Carlisle Gray, Cambria Quartz

We also got our gallery wall up in the dining room. Starting to feel more homey all the time.

While we're talking about DIY projects in my kitchen, here's another one I'm pretty proud of - my "kitchen window" mirror. This window was part of the screen door that was original to our first house (so 1959ish) and when we replaced it, I insisted on keeping the window part since it was in pretty good shape and clipped out easily. Sure, it sat in the garage for a couple years, but I knew that one day, I'd have room to make it a focal point piece. Plus, I don't have a real window in my actual kitchen, so it's nice to pretend.

see the old blue table in the corner?
doesn't the black look so much better?!
(please don't tell me if you answered no...)
For the window, I scraped off all the peeling paint and glazing first.

Then sprayed the back of the glass with Krylon looking glass spray paint. This is what gives the regular windows the antique glass finish.


Next, I taped off the glass and put a fresh coat of white paint on it. I didn't worry about it being perfect, because I wanted it to have an antique feel.


Then, it waited for Mike to figure out how to hang it...

And lastly, I found the perfect wreath for the middle. I plan to change it out seasonally or whenever inspiration strikes.


Thanks for sharing this awesome renovation! It's amazing what a can of paint can do to both the walls and the furniture. It's nice to revamp a space and add some new elements to a room. You did such an amazing job on that old window. I actually picked one up at a local flea market not too long ago. Any refinishing tips you can share?
ReplyDeleteArthur Bryant @ Contractor Express
Thank you for the kind words! My only tip is to take your time, especially with the spray paint on the back - several even light layers works best. The great thing about using an antique window is that the final product doesn't have to be perfect - I actually really appreciate all the little imperfections! Good luck :)
ReplyDelete